Mobile Game Tutorial Highlighting in Unity
24 February 2022
tl;dr This tutorial will show you how to create the basic UI for a mobile tutorial system within Unity3D. Mainly it explains how to do some of the painful UI setup and the calculations. In Unity, everyone’s UI is different, so this should be broadly applicable. As long as you have some sort of “Panel System” in your UI, where a single prefab represents a panel. It should be able to be adapted to whatever you might have.
Ever encounter one of the problems during your software engineering travels where its seems like you’re the only one looking for discussion on the topic? I was recently asked to implement a tutorial system within a project. And it seemed like no one online was trying to solve the same thing. Well I had some hiccups and since I couldn’t find any documentation on it…. I decided to write this up and give back to the community. 💖
For the uninitiated, tutorial systems within mobile games follow a common trope. Its a bit hard to explain, so heres some examples:
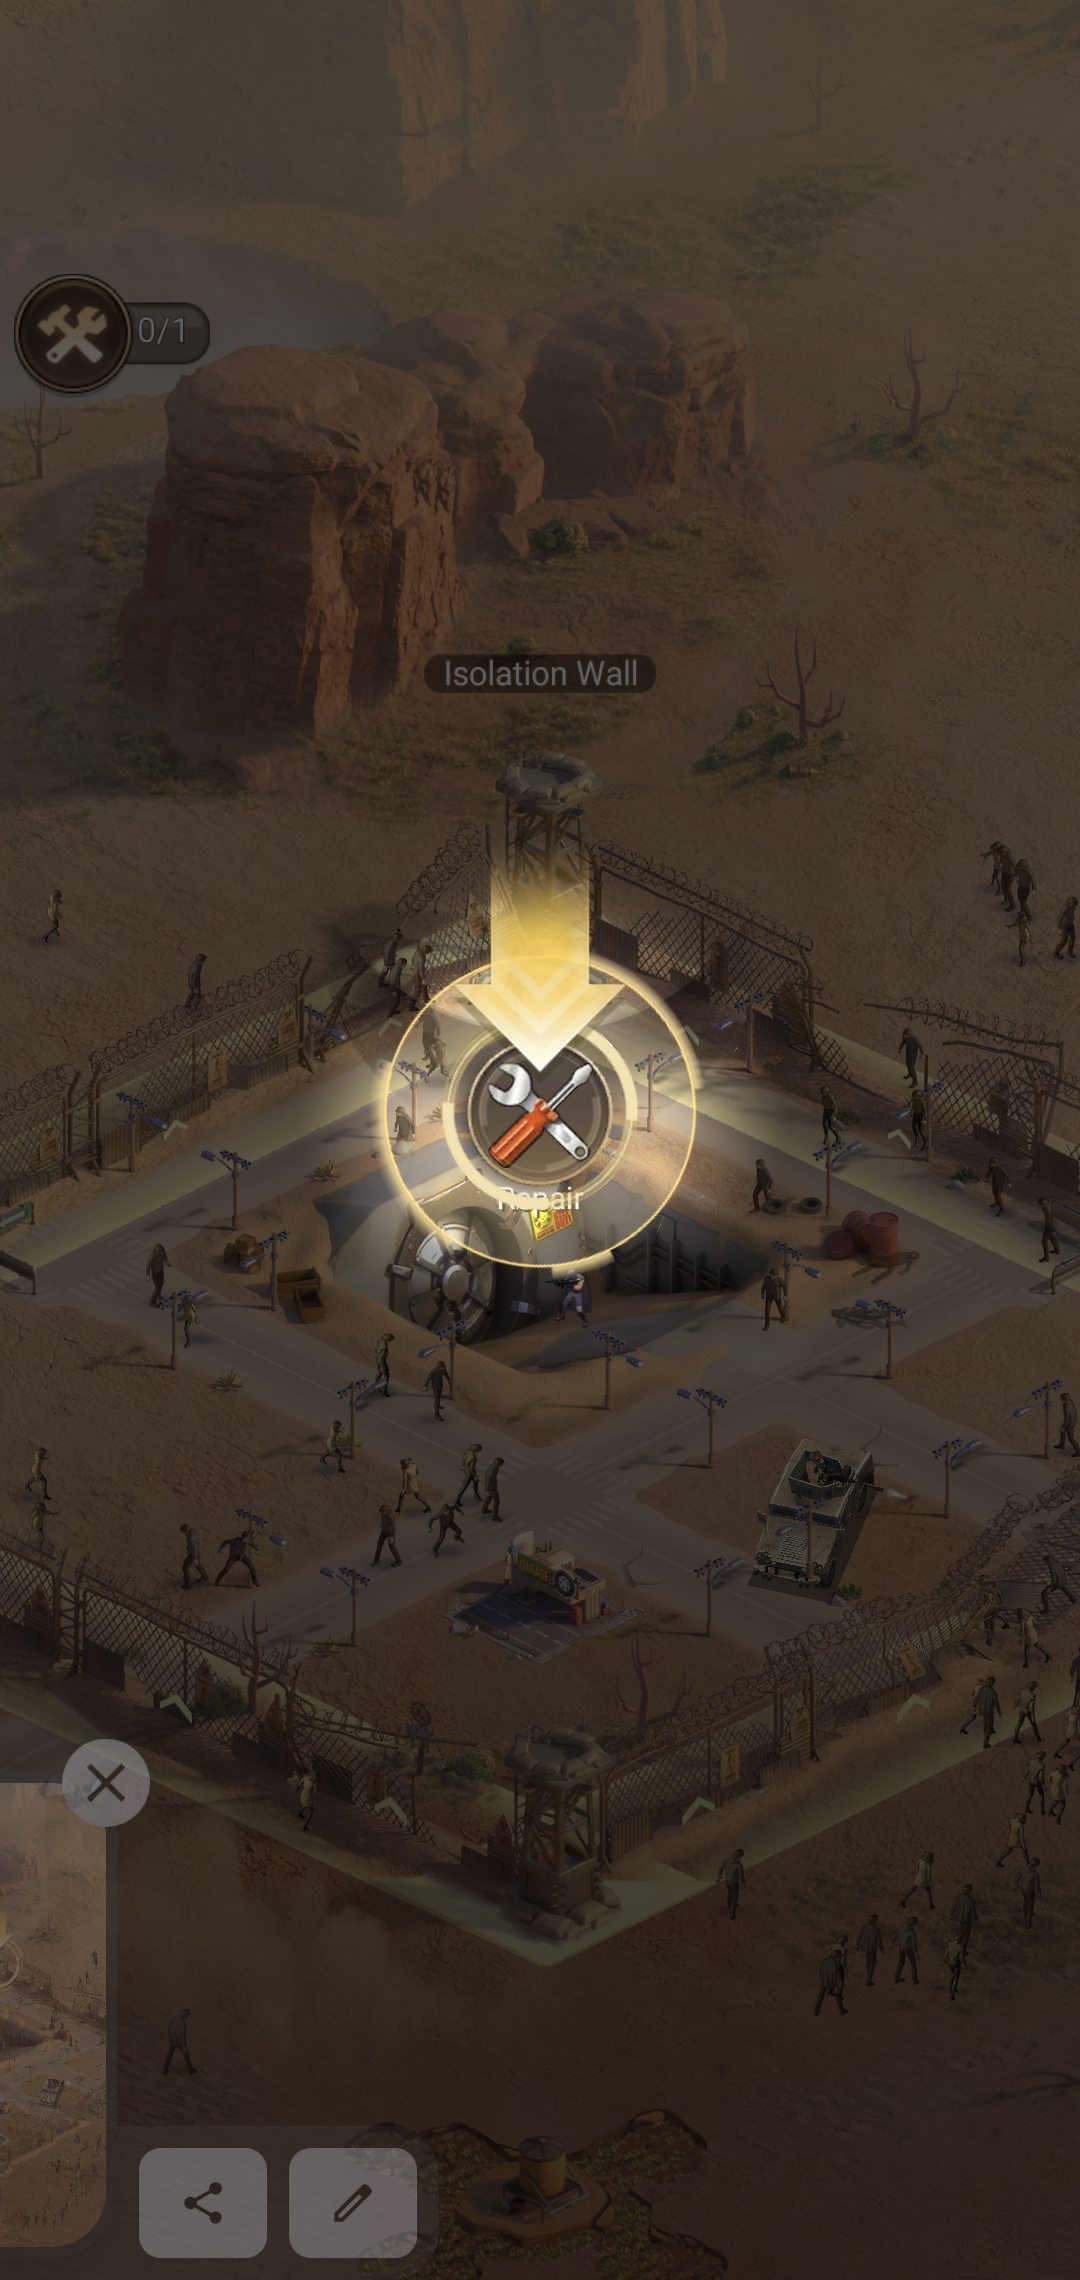
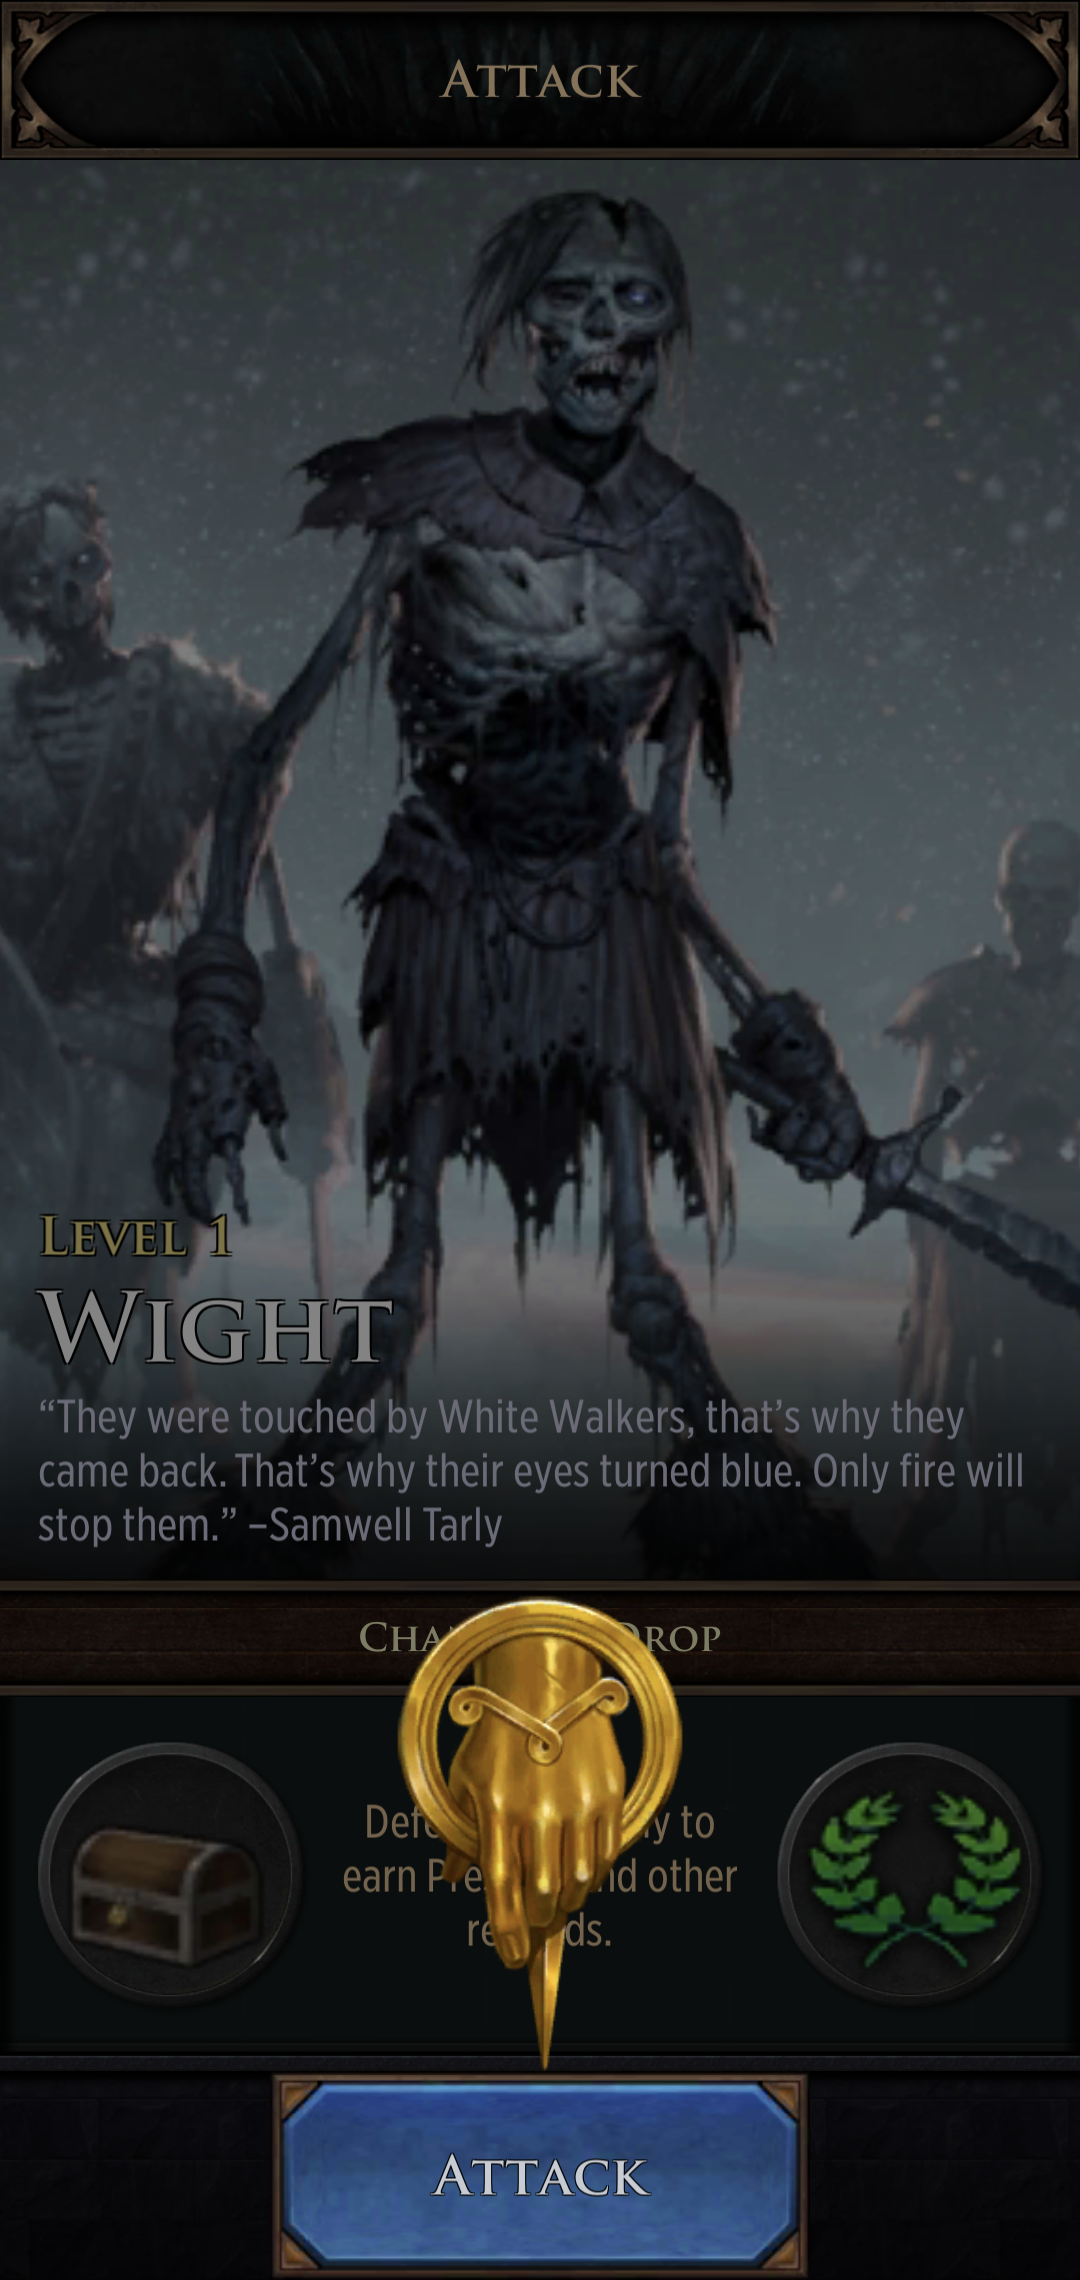
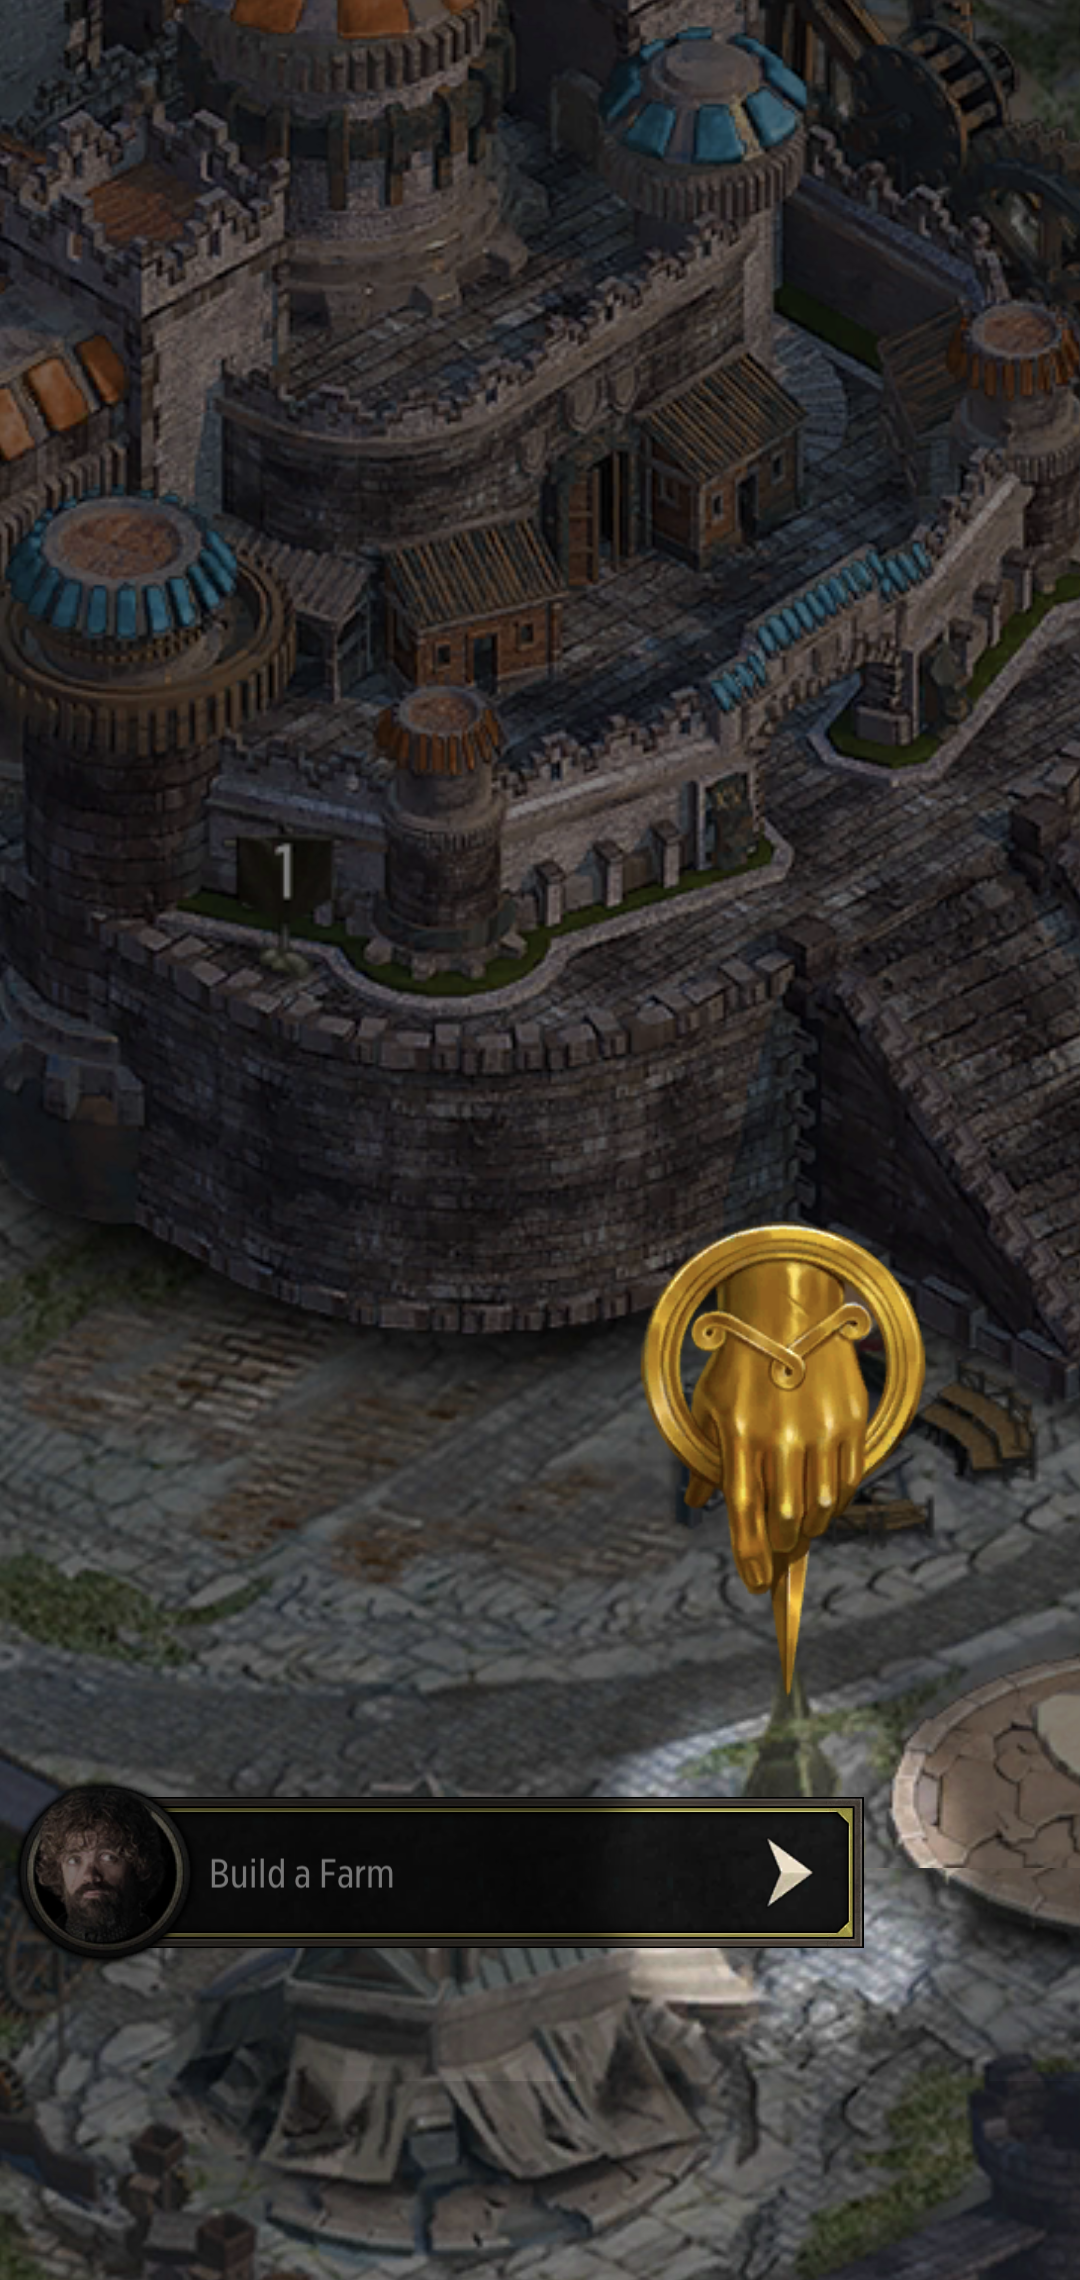
Shown above, it follows these core concepts:
- Overlay UI on top of the current panel to simulate the below panel being “grayed out”.
- Provide some sort of see through area. Notably, this means the player can click through to some button or area.
- (Optionally) Display some other UI elements over this grayed area
To my knowledge, in the UI world, this is called a scrim. If its not, feel free to let me know.
Goal:
Make a tutorial panel like the ones shown above. Allow developers to “focus” on an arbitrary RectTransform that exists on another UI element. This is trying maintain the idea that developers should not have to modify the gameplay panels just to add a tutorial focusing to it.
Tutorial Panel Setup
One reason for making this whole post is to save ya’ll some time with this part. The UI setup I’m about to show is critical to making the additional code below work. Here’s how and why its setup this way.
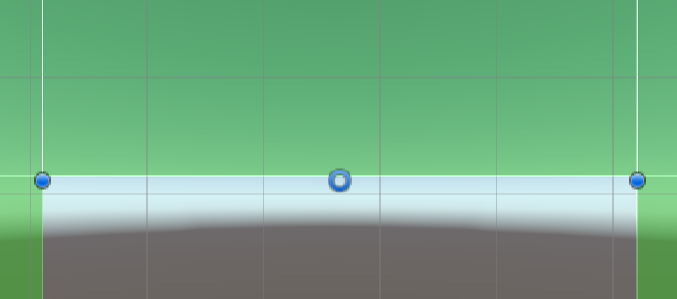
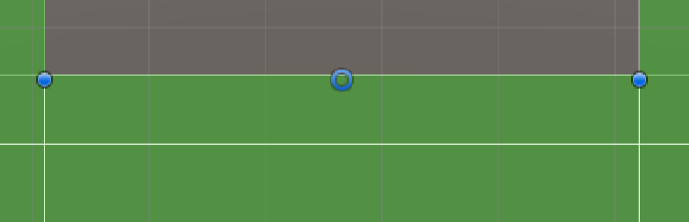
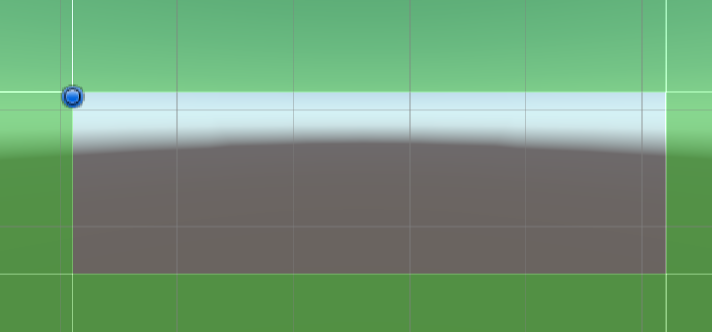
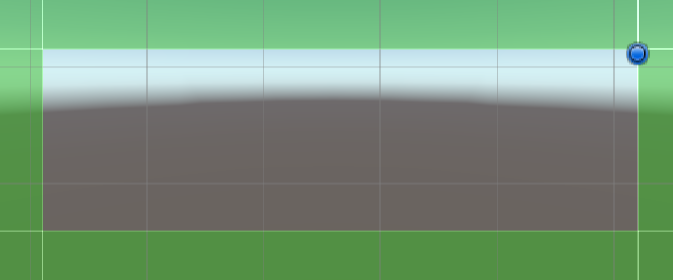
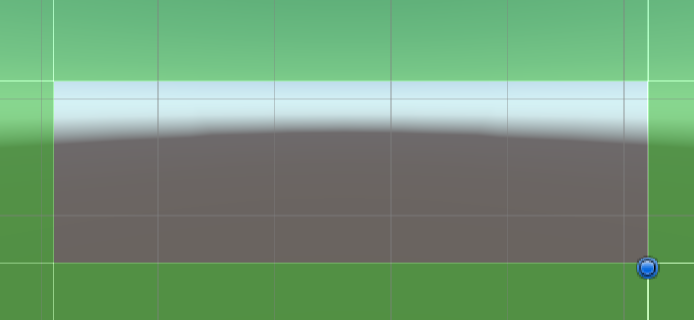
The 8 Boxes
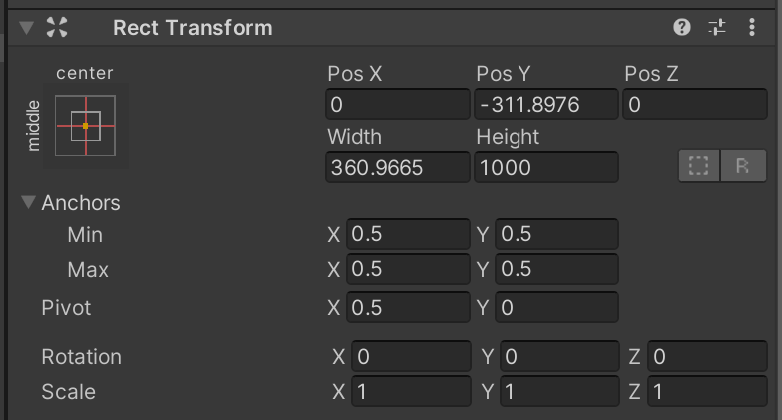
The core of this is the following 8 RectTransforms positioned and anchored in such a way that make it suitable for positioning around an arbitrary target object.
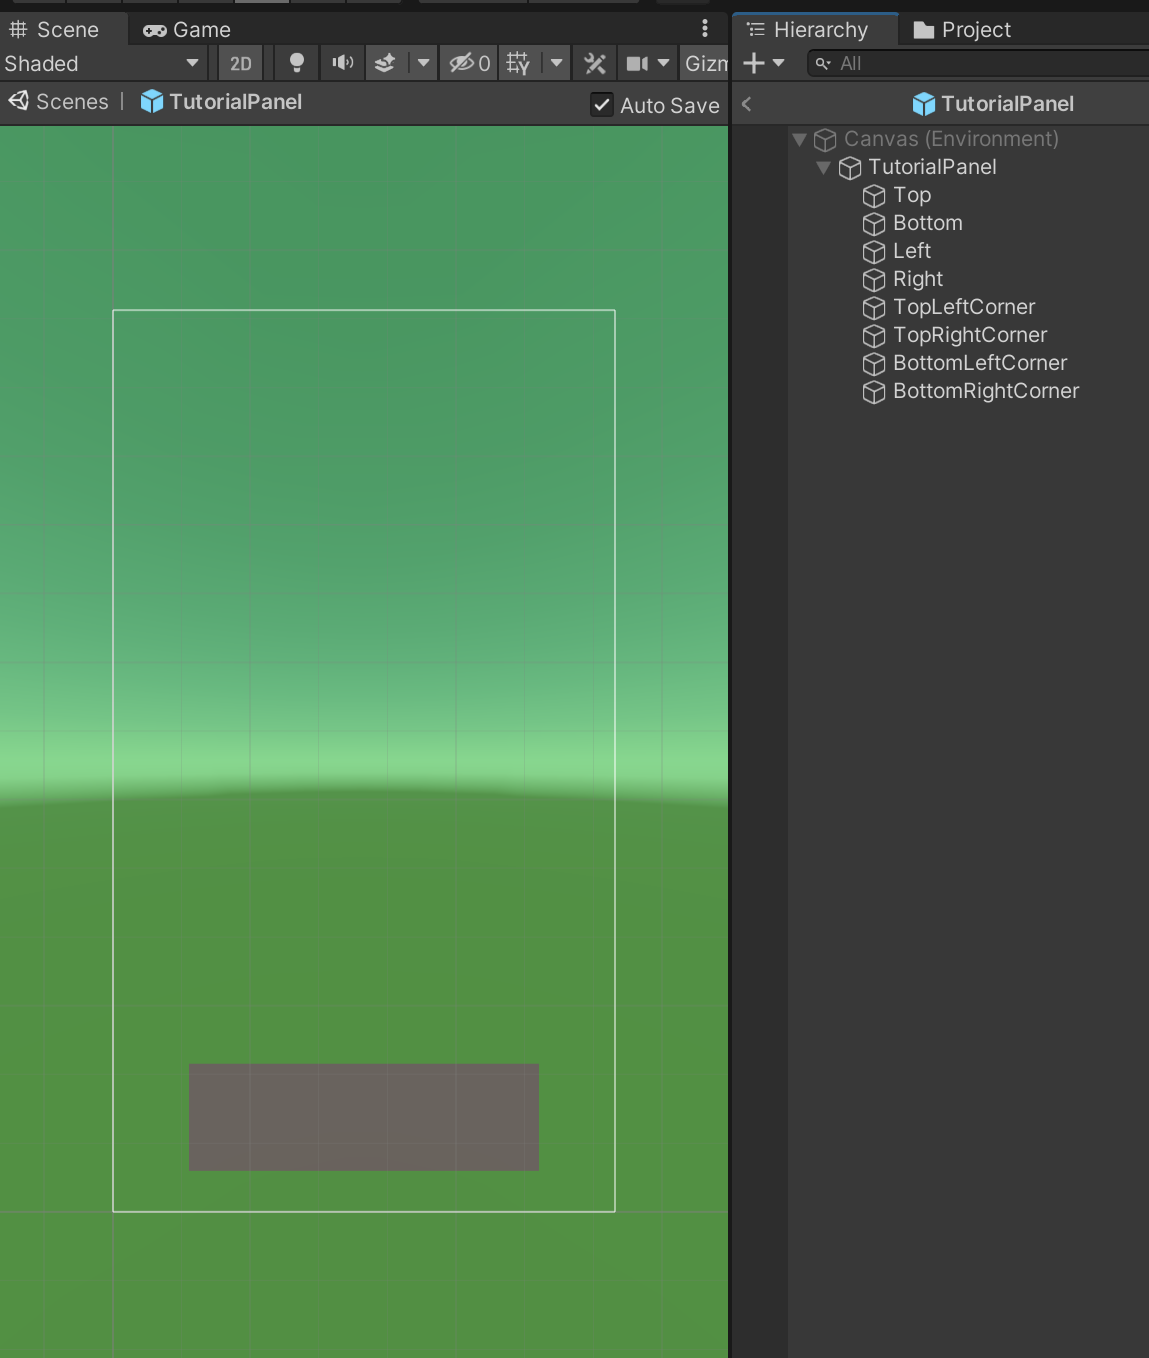
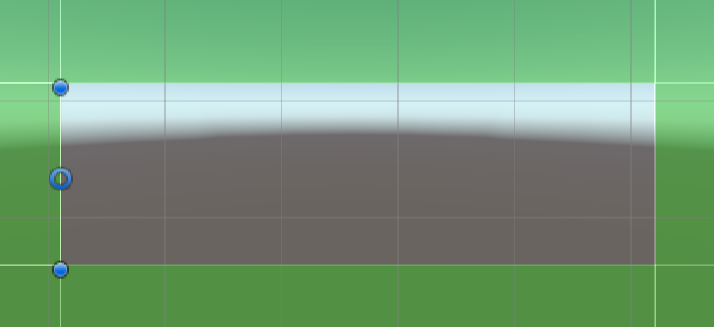
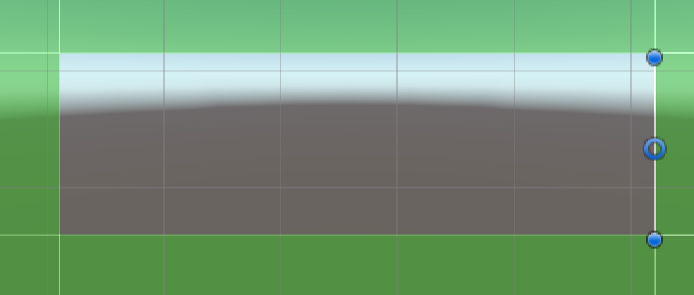
Next note the hierarchy, and the boxes positions. Each point is anchored towards the center of the screen. Also, kinda goes without saying, but all of these RectTransforms have an image component on them. Color them dynamically or set the color of the scrims to whatever you want. Also the image components should have there Raycast Target field checked so other input is prevented.

Next up, create your script that’ll manage this panel, I suggest placing it on the panel root, but since everything is referenced directly, but it shouldn’t matter.
public class TutorialPanel : MonoBehaviour
{
	public RectTransform Top, Bottom, Left, Right;
	public RectTransform TopLeftCorner, TopRightCorner, BottomLeftCorner, BottomRightCorner;
}
Additionally, note that each rect has its width set to 1000. This is to ensure that it will stretch all the way off screen, regardless of the object its focusing on. Ideally, I would have had time to write a bit more logic to make it fit within the bounds of the enclosing rect, but I never got to it…
Now, the moment you’ve been waiting for! You don’t have to set any of this up! Took me a good hour to figure out and set this all up, so here’s a unity package with a prefab ready to go! (No script though, you’ll find that below). This should import fine with any version of Unity.
The Focus Function
Finally, we’ll add some more logic to the TutorialPanel script the we’ll actually call when we want to focus on some object. This function is basically my whole reason for making this post. Since I’m a bit dumb, and mostly guessed and checked my way here. I figured I should do anything I can to save someone else the time. So here ya go.
public void FocusOnTarget(Canvas canvas, float padding, RectTransform focusTarget)
{
  Vector3[] corners = new Vector3[4];
  focusTarget.GetWorldCorners(corners);

  Vector3 top, bottom, left, right;
  Vector3 topLeftCorner, topRightCorner, bottomLeftCorner, bottomRightCorner;
  // Set the corner points and apply position
  topLeftCorner = new Vector3(corners[1].x - padding, corners[1].y + padding, 0);
  topRightCorner = new Vector3(corners[2].x + padding, corners[2].y + padding, 0);
  bottomLeftCorner = new Vector3(corners[3].x + padding, corners[3].y - padding, 0);
  bottomRightCorner = new Vector3(corners[0].x - padding, corners[0].y - padding, 0);
  TopLeftCorner.transform.position = topLeftCorner;
  TopRightCorner.transform.position = topRightCorner;
  BottomLeftCorner.transform.position = bottomLeftCorner;
  BottomRightCorner.transform.position = bottomRightCorner;
  // Set the middle points and apply position and padding
  top = ((topRightCorner + topLeftCorner) / 2);
  bottom = ((bottomLeftCorner + bottomRightCorner) / 2);
  left = ((topLeftCorner + bottomRightCorner) / 2);
  right = ((topRightCorner + bottomLeftCorner) / 2);
  // Calculate the width (remember, Left and Right are rotated, thats why
  // we're not setting the height) of the boxes. Based on distance accounting
  // for scale.
  float tbwidth = Vector3.Distance(topLeftCorner, topRightCorner) / canvas.scaleFactor;
  float lrWidth = Vector3.Distance(topLeftCorner, bottomRightCorner) / canvas.scaleFactor;
  Top.transform.position = top;
  Top.sizeDelta = new Vector2(tbwidth, Top.sizeDelta.y);
  Bottom.transform.position = bottom;
  Bottom.sizeDelta = new Vector2(tbwidth, Bottom.sizeDelta.y);
  Left.transform.position = left;
  Left.sizeDelta = new Vector2(lrWidth, Left.sizeDelta.y);
  Right.transform.position = right;
  Right.sizeDelta = new Vector2(lrWidth, Right.sizeDelta.y);
}
Walking through the function
Trying to keep things logical, going to walk through some bits of it, top to bottom:
Three parameters:
Canvas canvasis the just to handle scaling. If you’re drawing the tutorial panel and object you’re focusing on are using two different panels, well idk, good luck. If the scales are the same, it should be finefloat paddingis pretty straight foreword. As stated in the goal, we don’t want to have to modify the game panel or the object we are focusing on, but we also don’t want to highlight just the edges of the button.RectTransform focusTargetis the object you want to highlight.
That Unity sauce
focusTarget.GetWorldCorners(corners); is the true magic here, you can find the docs for it here. But the long and short of it is, that this method does some math for you to determine the positions of the corners of your rect, in world space.
Pulling my hair out for you
Note how I’m setting the transform.position on the objects, as opposed to doing the more standard practice of modifying the RectTransform. This is because we are getting the world position from the GetCorners() method. One of the great things about this method of doing this is that it doesn’t care about anchoring or positioning of the target rect. Since the he GetCorners() method ignores all of that, so regardless of the complexity of your UI (like anchoring, nested in other anchors, etc) it should be able to focus on it.
The result:
I used a bit of Odin Inspector goodness to make this button to test it at editor-time. You could just try it at runtime, or create your own editor script.
This is my first time ever doing something like this, so if you found this helpful, let me know I’m not insane by giving me a thanks email. Also if you have any questions on the matter, feel free to shoot me an email for that too!